Vincent Cheung

Vincent Cheung's Blog


Home Older Posts »

Friday, February 27, 2009

Shape Collage 2.1

Shape Collage 2.1 has been released!

There are a couple new features, some performance tweaks, and some bug fixes. The coolest new feature is the ability to add photos from the web. Just give it *any* webpage that has pictures on it and Shape Collage will automagically download the pictures from that webpage for use in the collage! This does not however, work for sites that require you to login, like Facebook, but that's what FaceDown is for.

Other new features include the ability to adjust the rotations of the photos and the drop shadow. The program settings are now saved between sessions so if you like the settings a certain way, you don't have to set them every time.

I promise that this blog is not becoming an advertisement for Shape Collage and VincentCheung.ca. I will be blogging about my vacation (eventually) :p

Thursday, December 04, 2008

Shape Collage


Some collages of Tiki made using Shape Collage


Shape Collage is the latest side project that I've been working on. It is an automatic photo collage making program that can make collages in different shapes. Just look at the collages above and at the end of the post to see what it can do. There are a lot more examples on the Shape Collage web page.

It's really easy to make a collage. You can make one with just 2 mouse clicks and in as little as a couple seconds! It's quite customizable as well, as you can change the shape to really, anything you want. You can even draw your own shape! You can also customize the border, background, etc.

Arranging photos into a collage


The photos are automatically placed in the desired shape of the collage using a machine learning algorithm that I came up with that is simple, but fast and effective. Basically what it does is put the photos on a page and jiggle them around so they are arranged nicely. This is a much harder problem than you may think. My readers with some knowledge of computer science will be familiar with NP problems. My algorithm isn't perfect, but it does a pretty good job most of the time. If you're really anal about it, you can save the collage as a Photoshop PSD and edit the collage in Photoshop if you don't like the automatic placement of the photos.

I started working on this project b/c I read a paper that automatically created a photo collage and thought that it was really cool, especially since it took me so long to make my Californian photo collage. Since they didn't actually release a program or their source code, I decided to just implement their approach, but it was overly complicated and rather slow - it took several minutes to create a collage with just 30 photos. So, I tried something simpler that was much faster - my program can easily create a collage with thousands of photos. Then I realized that my algorithm didn't have to only create rectangular collages and could also create collages in different shapes, something that I had never seen before, and so Shape Collage was created!

Anyways, check it out and let me know what you think! It's available for Windows, Mac OS X, Linux, and anything that supports Java.

Snowboarding snowman collage


Volleyball collage

Friday, December 07, 2007

I built this with my bare hands

I forgot something on my "Why I haven't been blogging" post.

Over the summer, I built my own computer for the first time! I've been taking computers apart, fixing them, and upgrading them myself for about a dozen years now, so I've known the inside out of computers for a while now, but never actually built my own from scratch. It was fun actually (some frustration when some things didn't work as planned) and I learnt quite a bit from having to research each individual part in the computer that I wanted to get.

My computer turned out to be cheaper (about $1500, which is worth it since I'm on it all the time), more powerful (2.4Ghz Intel Core 2 Quad (4 CPUs), 4GB RAM, 1TB hard drive space, ATI Radeon Pro X1950), and quieter (I got a case that muffles sounds and bigger fans that can push the same amount of air by spinning slower).

It's about 3 times faster than my old computer (which was 4 years old) and I'm quite happy with it.

Friday, December 29, 2006

It's a Quinzee!!!!

Snow Quinzee!!!


Video tour of the quinzee


I built a quinzee! (Ya, I still don't have a Nintendo Wii...)

They're pretty easy to make:
  1. Make a big pile of snow (the dry powdery stuff, not the wet stuff like the first snowfall)

  2. Let it sit overnight (no packing or water required)

  3. Dig out the inside (stop digging when you start to see light through the walls)


It's one of the bigger ones that I've made. I figure you can fit 4 people inside. Rather cramped, and the people have to be my size, but 4 people.

The snow piling took about an hour. It was harder than it looked b/c shoveling snow on grass is hard. You can't just shovel normally otherwise you rip out the grass and there was only a few inches of snow cover, so there wasn't much to scoop up. The excavation took me about 2 hours today. It would've been easier if someone was outside to shovel away the dug out snow, rather than me trapping myself inside :). It was rather surreal just sitting inside the quinzee with the entrance blocked. The world just disappeared as it was eerily silent. The snow is translucent, so it was still light enough to see inside the quinzee.

With the huge amount of snow I excavated, I decided to convert the bachelor apartment quinzee into a 1 bedroom! I'll dig it out this weekend.

1 bedroom quinzee suite available for rent Jan. 2007


Quinzee building has turned into a bit of a tradition for me. My older sister taught me and my younger sister how to build one after she learnt how in winter camp, which would've been like 1989 or 1990.

"Snowman Quinzee" 2002 (some rotten kids kicked it in) and Quinzee 1991 (there's a picture of Lucky inside of it, but I can't find it right now)

Sunday, October 29, 2006

vince's crafty craft blog

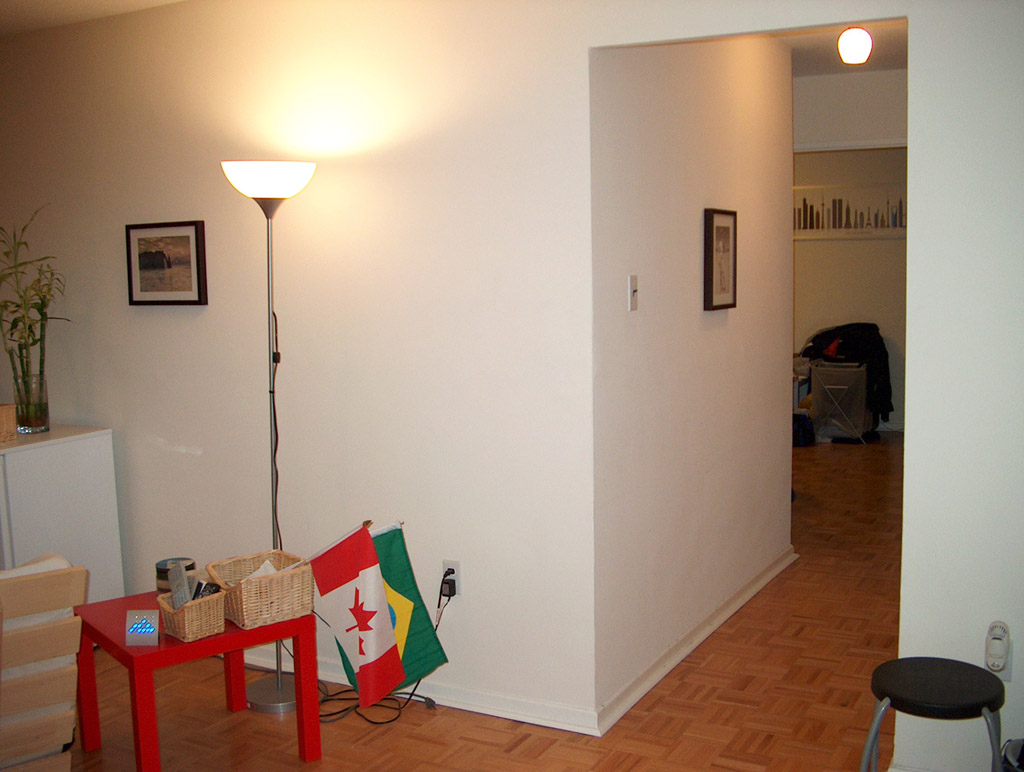
My apartment with newly hung art.
Bonus points if you can tell me what time I took the photo.


The Cliff Etreat by Monet


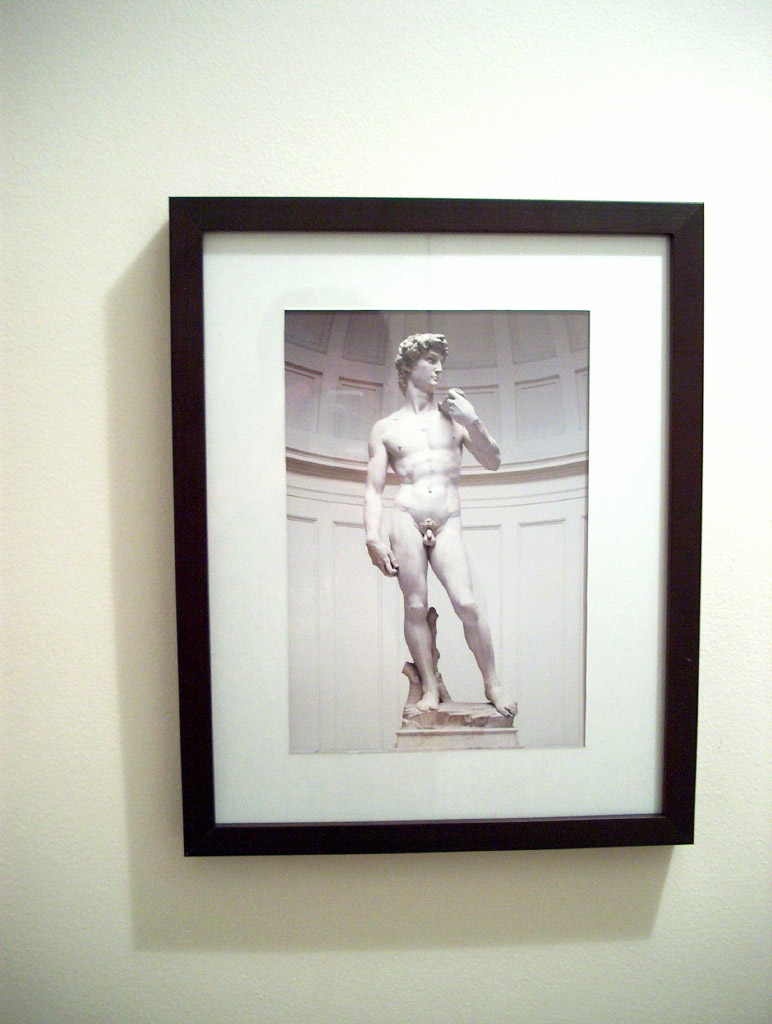
David by Michelangelo


Finally got around to doing something with the art prints that I had. Framing the prints make them look so much nicer and they serve as nice decoration for the apartment.

The Monet print was a piece of cake as by luck, the included matte for the print fit perfectly into the 11x14 frame. The David print was a bit tougher though as it didn't come with a matte and the included one in the frame didn't fit. I took the cardboard backing from the Monet print (since it fit the frame and was white and had decent thickness) and cut out a matte for the David print using my swiss army knife for lack of a better tool. It looks decent and I was quite pleased given what I had to work with. It would have been nicer had I been at home and had access to my sister's craft stuff b/c she has a paper cutting thing where I could properly cut a bevelled matte.

I want to get a few more art prints now, probably another Monet and then non-impressionist ones to mix it up. I prefer paintings, though I might consider a photographed landscape for diversity. I'll probably stick to small prints, as large replica prints of paintings just look fake, though when I move into a more permanent place, I'd like to get some large canvas art for decoration.
Home Older Posts »